


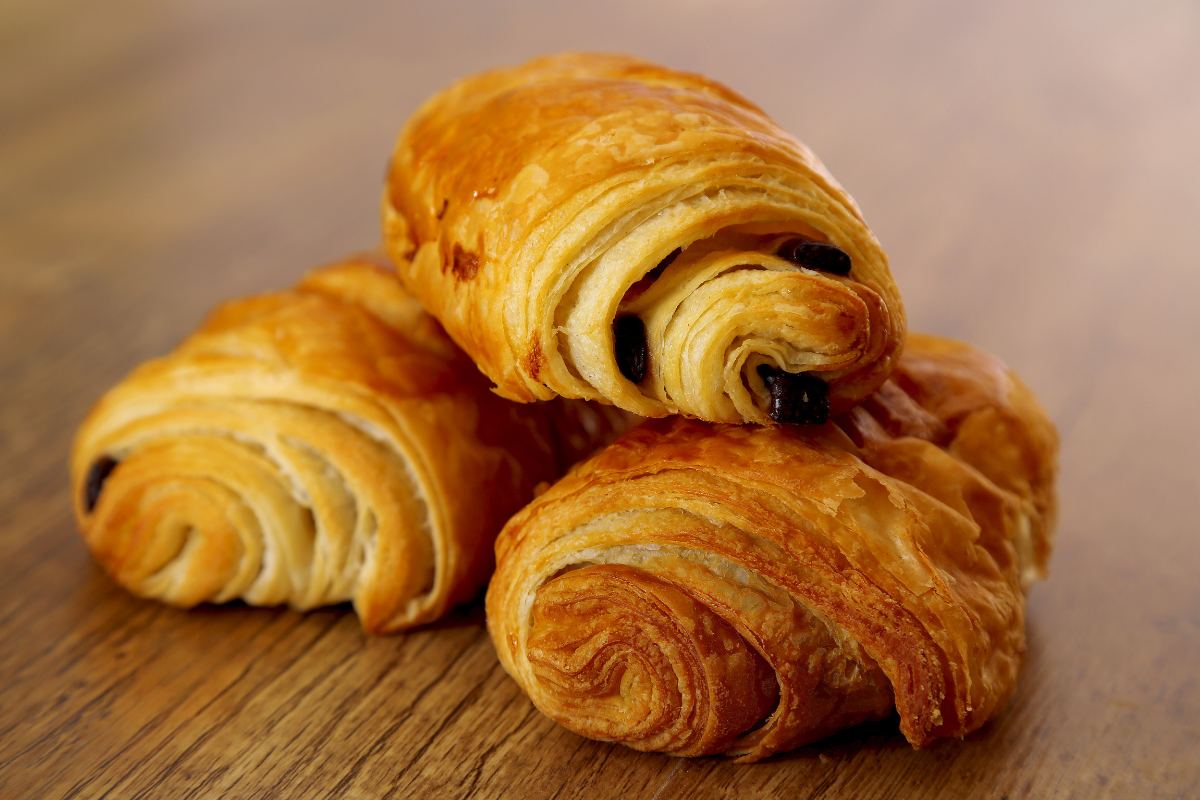
Introduction to the Delightful World of Pain au Chocolat
Ah, the pain au chocolat! This delightful pastry has captivated taste buds across the globe with its flaky exterior and rich chocolate center. Originating from France, this culinary gem is more than just a breakfast item; it’s a small treasure of French baking that embodies tradition and pleasure in every bite. In this comprehensive exploration, we’ll delve into the enchanting world of pain au chocolat, tracing its history, discussing its preparation, and even revealing where to find the best ones. Ready to unravel the secrets of this beloved pastry? Let’s get started!
History and Origin of Pain au Chocolat
Imagine strolling through the quaint streets of Paris in the early morning, the aroma of freshly baked goods wafting through the air. This is where our story begins, in the heart of France, the birthplace of the pain au chocolat. Known as “chocolate croissant” outside of France, this pastry is not merely a treat; it’s a piece of cultural heritage.
Ancient Beginnings and Evolution
In the 19th century, Parisian bakers began experimenting by adding dark chocolate pieces to the traditional croissant dough, rolling them to form the distinct rectangular shapes we recognize today. As these bakers honed their craft, the pain au chocolat rose in popularity, eventually becoming a staple in French pâtisseries.
Rise to Prominence in French Culture
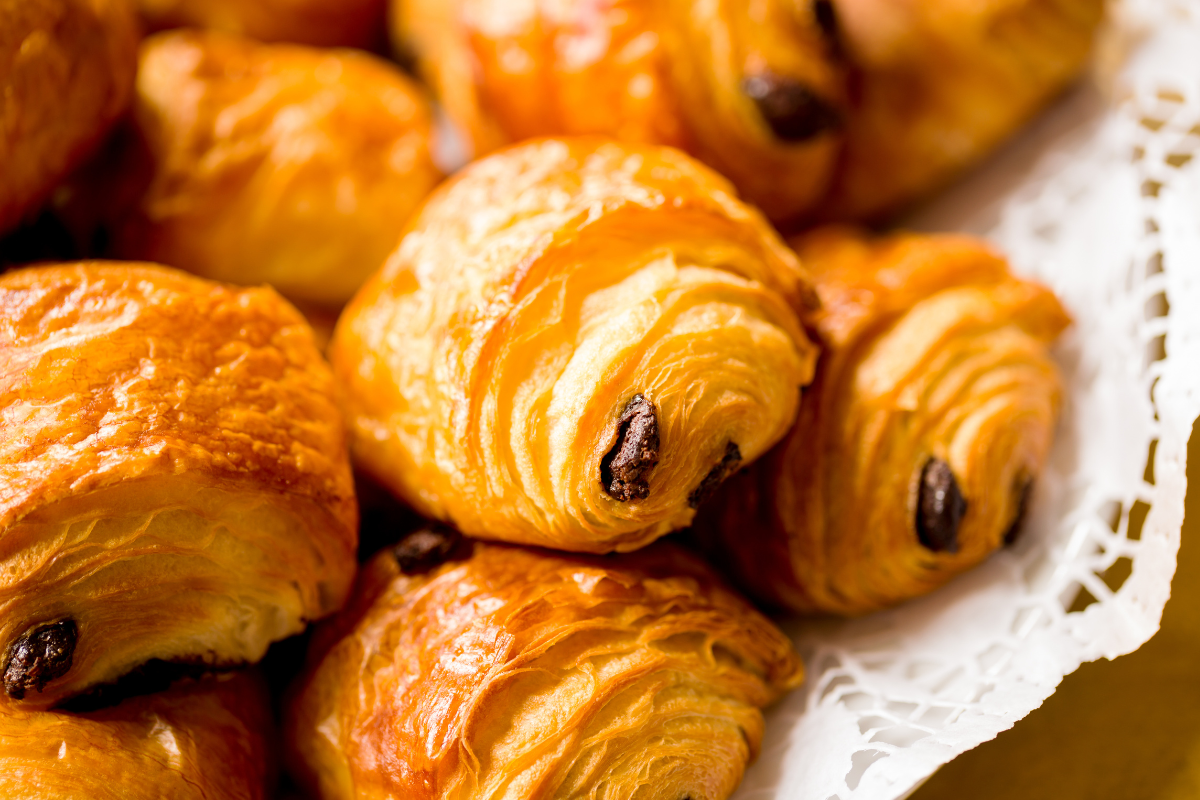
By the mid-20th century, pain au chocolat had cemented its status as a symbol of French culinary expertise. Enjoyed by people of all ages, it became synonymous with leisurely breakfasts in cafes and quick bites on the way to school or work. What once started as a simple variation on the croissant has now become an integral part of France’s identity, much like the baguette.
Today, the allure of pain au chocolat extends far beyond the borders of France, appealing to sweet tooths worldwide and becoming a fixture in cafes and bakeries globally. From its humble beginnings to its rise as a beloved treat, the history of this pastry is as rich and layered as the pastry itself.
Ingredients and Preparation of Pain au Chocolat
Crafting the perfect pain au chocolat is an art that requires precision, patience, and a passion for quality ingredients. Let’s break down the essentials of making this pastry and explore the variations that can add a unique twist to the classic recipe.
Key Ingredients
The foundation of any pain au chocolat is its dough, similar to that of a croissant, which is known for its buttery layers and airy texture. The main components include:
- Flour: Typically, high-gluten flour works best to provide the necessary elasticity.
- Butter: The soul of the pastry, unsalted and of high quality, is layered within the dough for that irresistible flakiness.
- Yeast: A crucial ingredient that helps the dough rise and develop its characteristic texture.
- Sugar: Just enough to enhance the flavor without overpowering the delicate balance.
- Salt: A pinch to bring out the flavors of the other ingredients.
- Water: To bind everything together into a smooth dough.
- Chocolate: Dark chocolate bars or sticks specifically designed for this pastry to ensure a rich, molten core.
The Art of Lamination
The secret to the pain au chocolat‘s flaky layers lies in the technique of lamination. This involves:
- Rolling out the dough and placing thin slabs of butter over it.
- Folding the dough in a way to create multiple layers, then chilling it.
- Repeating this process several times ensures that the butter is evenly distributed in thin sheets throughout the dough.
This meticulous process not only incorporates the butter thoroughly but also builds up layers that will puff up in the oven, creating the pastry’s characteristic texture.
Shaping and Baking
Once the dough is laminated:
- It’s rolled out and cut into rectangles.
- A piece or two of chocolate is placed on each rectangle before the dough is rolled around it.
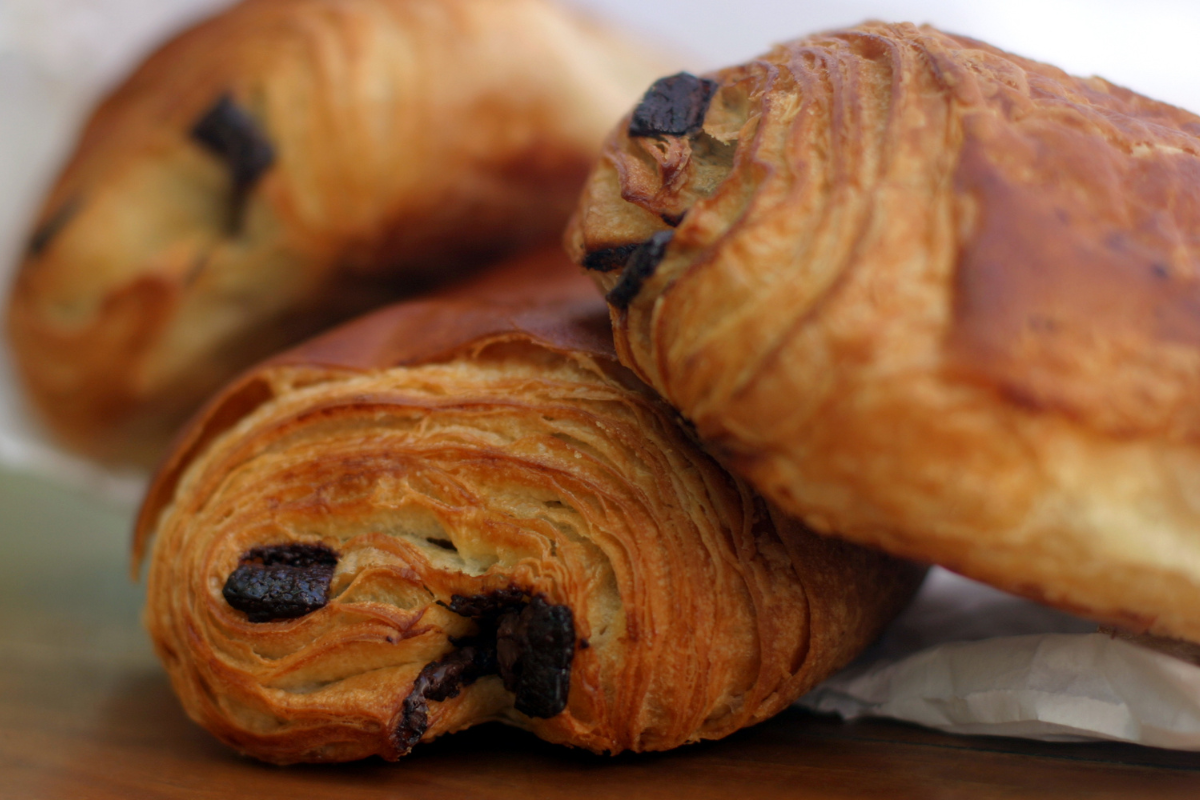
- After shaping, the pain au chocolat needs to rise at a cool temperature until it nearly doubles in size. This proofing is crucial as it develops the texture and ensures that the pastry will be light and airy.
- The final step is baking, which is done at a high temperature to turn the dough golden brown and to melt the chocolate just right, creating a gooey center enveloped in crisp layers.
For those seeking a twist, variations might include adding almond cream, dusting with powdered sugar, or even incorporating white chocolate for a different flavor profile. Each variation offers a new experience but remains true to the essence of the classic pain au chocolat.
In this preparation phase, the mastery lies not only in the quality of the ingredients but also in the care taken during each step of the process. The result? Each bite of this pastry offers a moment of indulgence, a taste of French baking tradition that has traveled across time and geography to delight enthusiasts everywhere.
Step-by-Step guide to make Pain au Chocolat
Ingredients:
- 500g of all-purpose flour (preferably high-gluten)
- 300g of unsalted butter (keep 250g chilled for lamination and 50g at room temperature for the dough)
- 10g of salt
- 50g of sugar
- 10g of instant yeast
- 140ml of water
- 140ml of whole milk
- 12-14 sticks of good-quality dark chocolate
- 1 egg (for egg wash)
Equipment:
- Rolling pin
- Large mixing bowl
- Pastry brush
- Sharp knife
- Baking sheet
- Parchment paper
Instructions:
Dough Preparation
- Mix Dry Ingredients: Combine the flour, sugar, salt, and yeast in a large bowl, giving them a slight mix.
- Gradually Add Liquids: As you mix, begin by slowly pouring the water and milk into the dry ingredients. Initiate with a spoon and transition to using your hands as the dough begins to form.
- Knead the Dough:Transfer the dough onto a lightly floured surface and knead it for approximately 10 minutes until it achieves a smooth and elastic consistency.
- First Rise: After kneading, transfer the dough into a lightly greased bowl. Proceed to cover it with plastic wrap and allow it to rise at room temperature for about 1 hour or until it doubles in size.
Lamination
- Prepare the Butter: As the dough rises, prepare the butter. Place the 250g of cold butter between two sheets of parchment paper and pound it with a rolling pin until it forms a flat rectangle about 1cm thick.
- Roll Out Dough: Once the dough has risen, turn it out onto a lightly floured surface and roll it into a rectangle. Ensure it’s just large enough to wrap around the butter.
- Encase the Butter: Place the butter sheet in the center of the dough rectangle and fold the dough over it, completely wrapping the butter.
- First Fold: Roll out the dough into a long rectangle, then fold it into thirds (like a letter). Turn it 90 degrees, roll out, and fold again. Wrap in plastic and chill for 30 minutes.
Shaping
- Roll Out Again: Take the dough out of the fridge and roll it into a large rectangle once more. Cut it into smaller rectangles.
- Add Chocolate: Place a stick of chocolate at one end of each rectangle. Roll the dough over the chocolate, then place another stick and roll up completely.
- Second Rise: Arrange the shaped pastries on a baking sheet lined with parchment paper, ensuring they’re spaced apart. Lightly cover with plastic wrap and let them rise again until puffy, about 1 hour.
Baking
- Preheat Oven: Heat your oven to 375°F (190°C).
- Egg Wash: Beat the egg with a tablespoon of water and brush it over the risen pastries.
- Bake: Place the baking sheet in the oven and bake for 15-20 minutes, or until golden brown.
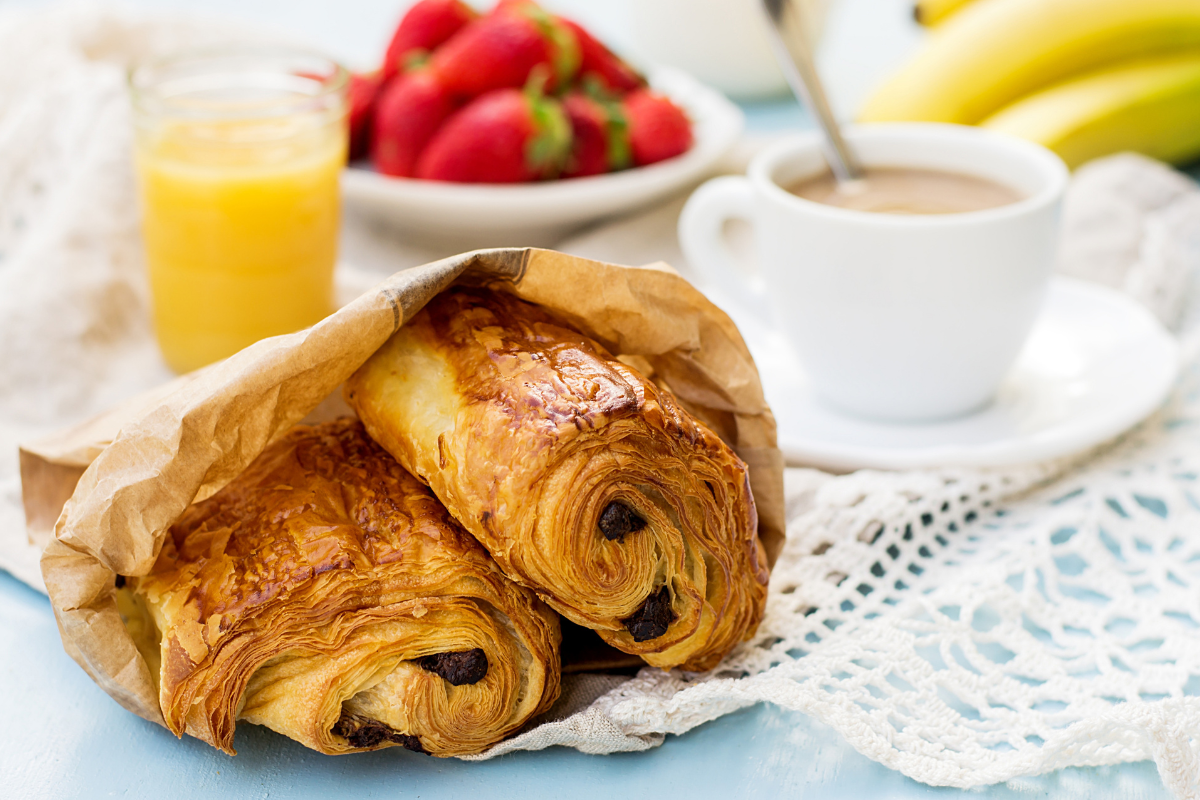
- Cool: Remove the pastries from the oven and let them cool on a wire rack.
Enjoy your homemade pain au chocolat fresh, or store them in an airtight container at room temperature for a couple of days. For best results, reheat them briefly in the oven before serving to revive the flaky texture.
Culinary Techniques for Perfect Pain au Chocolat

Achieving the perfect pain au chocolat is not just about following a recipe—it’s about mastering several key baking techniques that make all the difference. Let’s delve into the nuances of these methods to understand how they contribute to the pastry’s irresistible appeal.
The Importance of Dough Lamination
Dough lamination is the heart of making this pastry. This process involves carefully folding and rolling the dough to create thin layers of butter between the sheets of pastry. Here’s why it’s crucial:
- Butter Distribution: Even distribution of butter ensures that, as the pastry cooks, steam is released uniformly, creating those light, airy layers.
- Temperature Control: Keeping the dough cold during lamination prevents the butter from melting into the dough, which is vital for achieving distinct, separate layers.
Chocolate Selection and Placement
The type of chocolate and its placement within the dough are pivotal. Here are some tips:
- Quality Chocolate: Opt for high-quality chocolate with a high cocoa content for a deep, rich flavor that can stand up to the baking process.
- Strategic Placement: Positioning the chocolate at the lower third of the dough rectangle before rolling helps in even distribution after baking, ensuring each bite has a generous amount of chocolate.
Proofing and Baking
Proofing (allowing the dough to rise before baking) is another critical stage:
- Proper Proofing: The dough should double in size in a cool, draft-free environment. This slow rise allows the yeast to develop flavors and the dough to relax, enhancing texture.
- Baking Temperature: A hot oven (usually between 375°F to 400°F) is essential. The high heat quickly activates the yeast for a final rise, sets the layers formed by the butter, and caramelizes the sugars for a golden, crisp finish.
Handling and Storage
How you handle and store pain au chocolat also affects the quality:
- Gentle Handling: Minimize handling the raw dough to avoid deflating the layers. Use a sharp cutter to divide the dough to preserve the layers’ integrity.
- Optimal Storage: If not baking immediately, shaped pastries can be frozen and then thawed in the refrigerator overnight before proofing and baking.
These meticulous techniques contribute to the creation of a pain au chocolat that not only looks professionally made but also tastes heavenly. It’s about blending science with art—understanding the why behind each step—to achieve a masterpiece of pastry perfection. Through mastering these techniques, bakers transform simple ingredients into a celebration of texture and taste that makes pain au chocolat a beloved treat worldwide.
FAQS about Pain au Chocolat
Can I use bread flour instead of all-purpose flour?
Yes, you can indeed substitute bread flour for all-purpose flour when making pain au chocolat. Utilizing bread flour, with its higher protein content, can contribute to the creation of more gluten, resulting in a chewier texture. This quality is advantageous in achieving the desired flakiness and layered structure characteristic of this pastry.
How do I ensure my pain au chocolat is flaky?
To achieve flaky layers, proper lamination is key. This involves:
- Keeping the butter cold but pliable.
- Ensuring that the butter is evenly distributed by rolling out and folding the dough multiple times.
- Chilling the dough between folds to keep the butter from melting.
What type of chocolate should I use?
For the best results, use high-quality dark chocolate bars or batons specifically made for pastries. These chocolate types melt beautifully inside the pastry without becoming too runny or burning.
Why does my pain au chocolat deflate in the oven?
Deflating can occur if the pain au chocolat is under-proofed or if the butter has melted into the dough before baking. To avoid this:
- Ensure the pastries are well-proofed and puffy before baking.
- Keep the shaped pastries chilled and quickly transfer them to a hot oven to bake.
Can I make pain au chocolat ahead of time?
Yes, pain au chocolat can be prepared ahead of time. You can freeze the shaped, unbaked pastries and then bake them straight from the freezer, adding a few extra minutes to the baking time. Alternatively, refrigerate them overnight, allow them to come to room temperature, and then proof before baking.
How do I store leftover pain au chocolat?
Leftover pain au chocolat should be stored in an airtight container at room temperature for up to 2 days. For longer storage, wrap them individually in plastic wrap and freeze for up to a month. Reheat in the oven or microwave before serving to restore their texture.
Can I make gluten-free pain au chocolat?
Making gluten-free pain au chocolat is challenging due to the need for gluten to create layers. However, you can use gluten-free flours designed for baking, and incorporate additional binders like xanthan gum to help mimic the texture. Adjustments in technique and expectations in texture should be anticipated.
These FAQs cover common issues and tips to help you make the best pain au chocolat at home, ensuring delicious results every time!
Best Pain au Chocolat in Paris
For those on a quest to find the ultimate pain au chocolat, Paris is undoubtedly the pilgrimage site. Here, amid the historic streets and bustling cafés, some bakeries have perfected the art of this beloved pastry. Let’s explore where to find the best pain au chocolat in the City of Light.
Top Picks for Parisian Pain au Chocolat
- Du Pain et des Idées
- Located in the 10th arrondissement, this bakery is renowned for its traditional approach to baking. The pain au chocolat here is noted for its buttery layers and generous chocolate filling.
- La Pâtisserie Cyril Lignac
- Cyril Lignac, a celebrity chef, offers a modern twist on classic pastries. His pain au chocolat is a perfect blend of crispness and rich, gooey chocolate.
- Boulangerie Poilâne
- A historic spot that has been serving Parisians since 1932. Poilâne’s pain au chocolat combines artisanal tradition with exquisite taste.
- Blé Sucré
- Famous for its flaky texture and the balance between pastry and chocolate, Blé Sucré’s pain au chocolat is a favorite among locals and tourists alike.
- Pierre Hermé
- Known primarily for macarons, Pierre Hermé also excels in classic pastries. His pain au chocolat is luxurious, incorporating high-quality chocolate and a perfectly laminated dough.
What Makes Them Stand Out?
These bakeries not only utilize the finest ingredients but also adhere to traditional methods of pastry making. Consequently, the result is not just a pastry but rather a piece of edible art. What truly sets these establishments apart is their unwavering dedication to perfection. Often, they rise before dawn to commence the lamination process, ensuring that every batch is as fresh as possible.
Visiting These Parisian Gems
When you step into these bakeries, it’s not merely about tasting their wares; it’s about immersing yourself in the ambiance of Parisian café culture. Each location offers a unique glimpse into the art of French baking, providing valuable insight into why pain au chocolat has captivated so many.
In Paris, pain au chocolat transcends being a mere snack; it’s an immersive experience, a cherished ritual, and a beloved tradition. Regardless of whether you’re a local or a tourist, embarking on a quest for the best pain au chocolat is a journey through the heart of French culinary artistry. It’s a journey promising both delight and discovery.